Introduction
DIY garden pathways are an excellent way to add beauty and functionality to your yard, guiding visitors through your garden and creating a cohesive landscape design. Learning how to build walkways can be a rewarding project that not only enhances your outdoor space but also increases your property’s value. With a few tools, the right materials, and some planning, you can create eye-catching paths that perfectly complement your garden’s style. Here’s a guide to creating beautiful, durable walkways that will last for years to come.
Why DIY Garden Pathways Enhance Your Outdoor Space

DIY garden pathways do more than just lead you through your garden—they add structure, charm, and visual appeal to any outdoor area. Pathways provide defined walking areas that guide visitors through the landscape, helping protect plants and prevent soil erosion. Whether you have a small backyard or a sprawling garden, creating DIY pathways is a cost-effective way to elevate the design and functionality of your space. They also allow you to showcase your personal style with materials that match your garden’s theme, from rustic stone to modern pavers.
Planning Your Garden Pathway
Before you start digging, it’s essential to have a clear plan for your DIY garden pathways to ensure they enhance both the beauty and functionality of your outdoor space. Think about where the pathway will lead—perhaps from your patio to a garden bed or as a winding trail around your backyard. Here are some essential steps to help you plan your DIY garden pathways effectively, ensuring a beautiful and lasting addition to your outdoor space.
- Pathway Location: Observe your yard and identify areas where a pathway would be both functional and visually appealing. Consider practical routes that connect different parts of your garden.
- Design & Shape: Decide if you want a straight, formal pathway or a curved, informal one. Straight lines often suit contemporary gardens, while curved paths add a natural touch to traditional or cottage-style gardens.
- Material Selection: Choose materials that complement your landscape and fit your budget. Common options include stone, gravel, pavers, bricks, and mulch.
Types of DIY Garden Pathways
There are several materials you can use to create a beautiful pathway. Each material has its own charm and style:
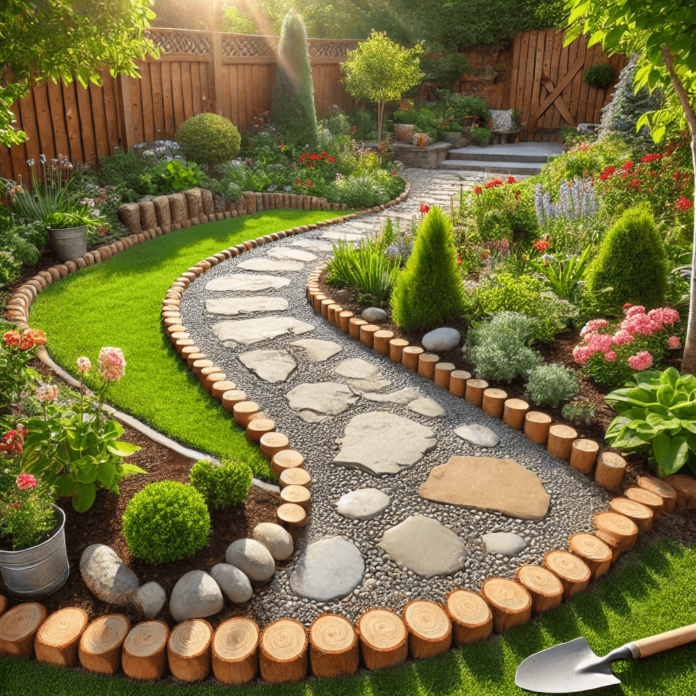
- Stone Pathways: Stone paths, using materials like flagstone or slate, provide a rustic and elegant look. They work well in gardens with a lot of greenery, blending naturally with the landscape.
- Gravel Pathways: Gravel is affordable, easy to work with, and provides a casual, rustic look. It’s ideal for curved paths and informal garden layouts. Gravel pathways require minimal maintenance but may need occasional leveling.
- Brick or Paver Pathways: Bricks or pavers are durable and offer a clean, classic look. They’re ideal for formal garden paths and can be installed in various patterns (such as herringbone, basketweave, or straight).
- Mulch Pathways: Mulch paths are affordable, easy to install, and blend naturally with most gardens. However, they may need to be replenished annually to maintain their appearance.
Essential Tools and Materials
Gathering the right tools and materials before you start will make the process much smoother. Here’s a quick list of essentials:
- Tools: Shovel, rake, level, garden hose or rope (for marking), tamper (for compacting soil)
- Materials: Pathway material (stones, gravel, pavers, or mulch), base layer material (such as sand or crushed stone), and optional edging materials like metal, wood, or plastic borders.
Step-by-Step Guide to Creating a Garden Pathway
Follow these steps to create a beautiful and durable pathway in your garden:
Mark and Measure the Path
- Use a garden hose or rope to lay out the shape of your pathway. Measure the width and length to estimate the amount of material you’ll need.
- Use spray paint to mark the outline of the path on the ground.
Dig Out and Level the Area
- Excavate the marked pathway area to a depth of around 4-6 inches, creating space for a sturdy base layer that will support your DIY garden pathway materials. This depth allows room for a sturdy base layer and the top pathway material.
- Use a level to ensure the surface is even. If you’re creating a path on a slope, make sure the path is angled to avoid water pooling.
Add a Base Layer
For a stable pathway, add a base layer of crushed stone or sand. Spread the material evenly and use a tamper to compact it. A solid base layer will help prevent shifting and settling over time.
Place Your Pathway Material
- Stone Path: Place stones or flagstones on the base layer, leaving small gaps for plants or decorative gravel if desired.
- Gravel Path: Pour gravel over the base layer to a depth of about 2-3 inches, spreading it evenly with a rake.
- Paver or Brick Path: Lay pavers or bricks in your desired pattern, pressing them firmly into the base layer. Check alignment frequently.
- Mulch Path: Spread mulch along the path to a depth of 3-4 inches.
Add Edging and Compact
- Use edging materials to keep the pathway’s shape and prevent materials like gravel or mulch from spreading into your garden beds.
- For stone, gravel, or paver pathways, compact the top layer with a tamper or a garden roller to secure the materials in place.
Tips for Maintaining Your Garden Pathway
Proper maintenance will keep your garden pathway looking fresh and functional for years:
- Regular Cleaning: Sweep debris off brick, stone, or paver pathways regularly to prevent buildup.
- Weed Control: Use a weed barrier cloth under gravel or mulch paths to minimize weed growth.
- Replenishing Materials: Add fresh mulch or gravel annually as needed to maintain the pathway’s appearance and integrity.
- Leveling and Adjusting: Check for any uneven areas, especially after rainy seasons, and add material where necessary to keep the pathway level.
Conclusion
Creating a DIY garden pathway is a fantastic way to enhance your outdoor space, adding both style and functionality. Whether you choose rustic stones, modern pavers, or casual mulch, a well-designed path will serve as both a decorative and practical addition to your yard. By following these steps, you can build a stunning walkway that will last for years, bringing beauty and structure to your garden. Remember, a little planning and regular upkeep go a long way in making sure your pathway remains a valuable feature of your landscape.


